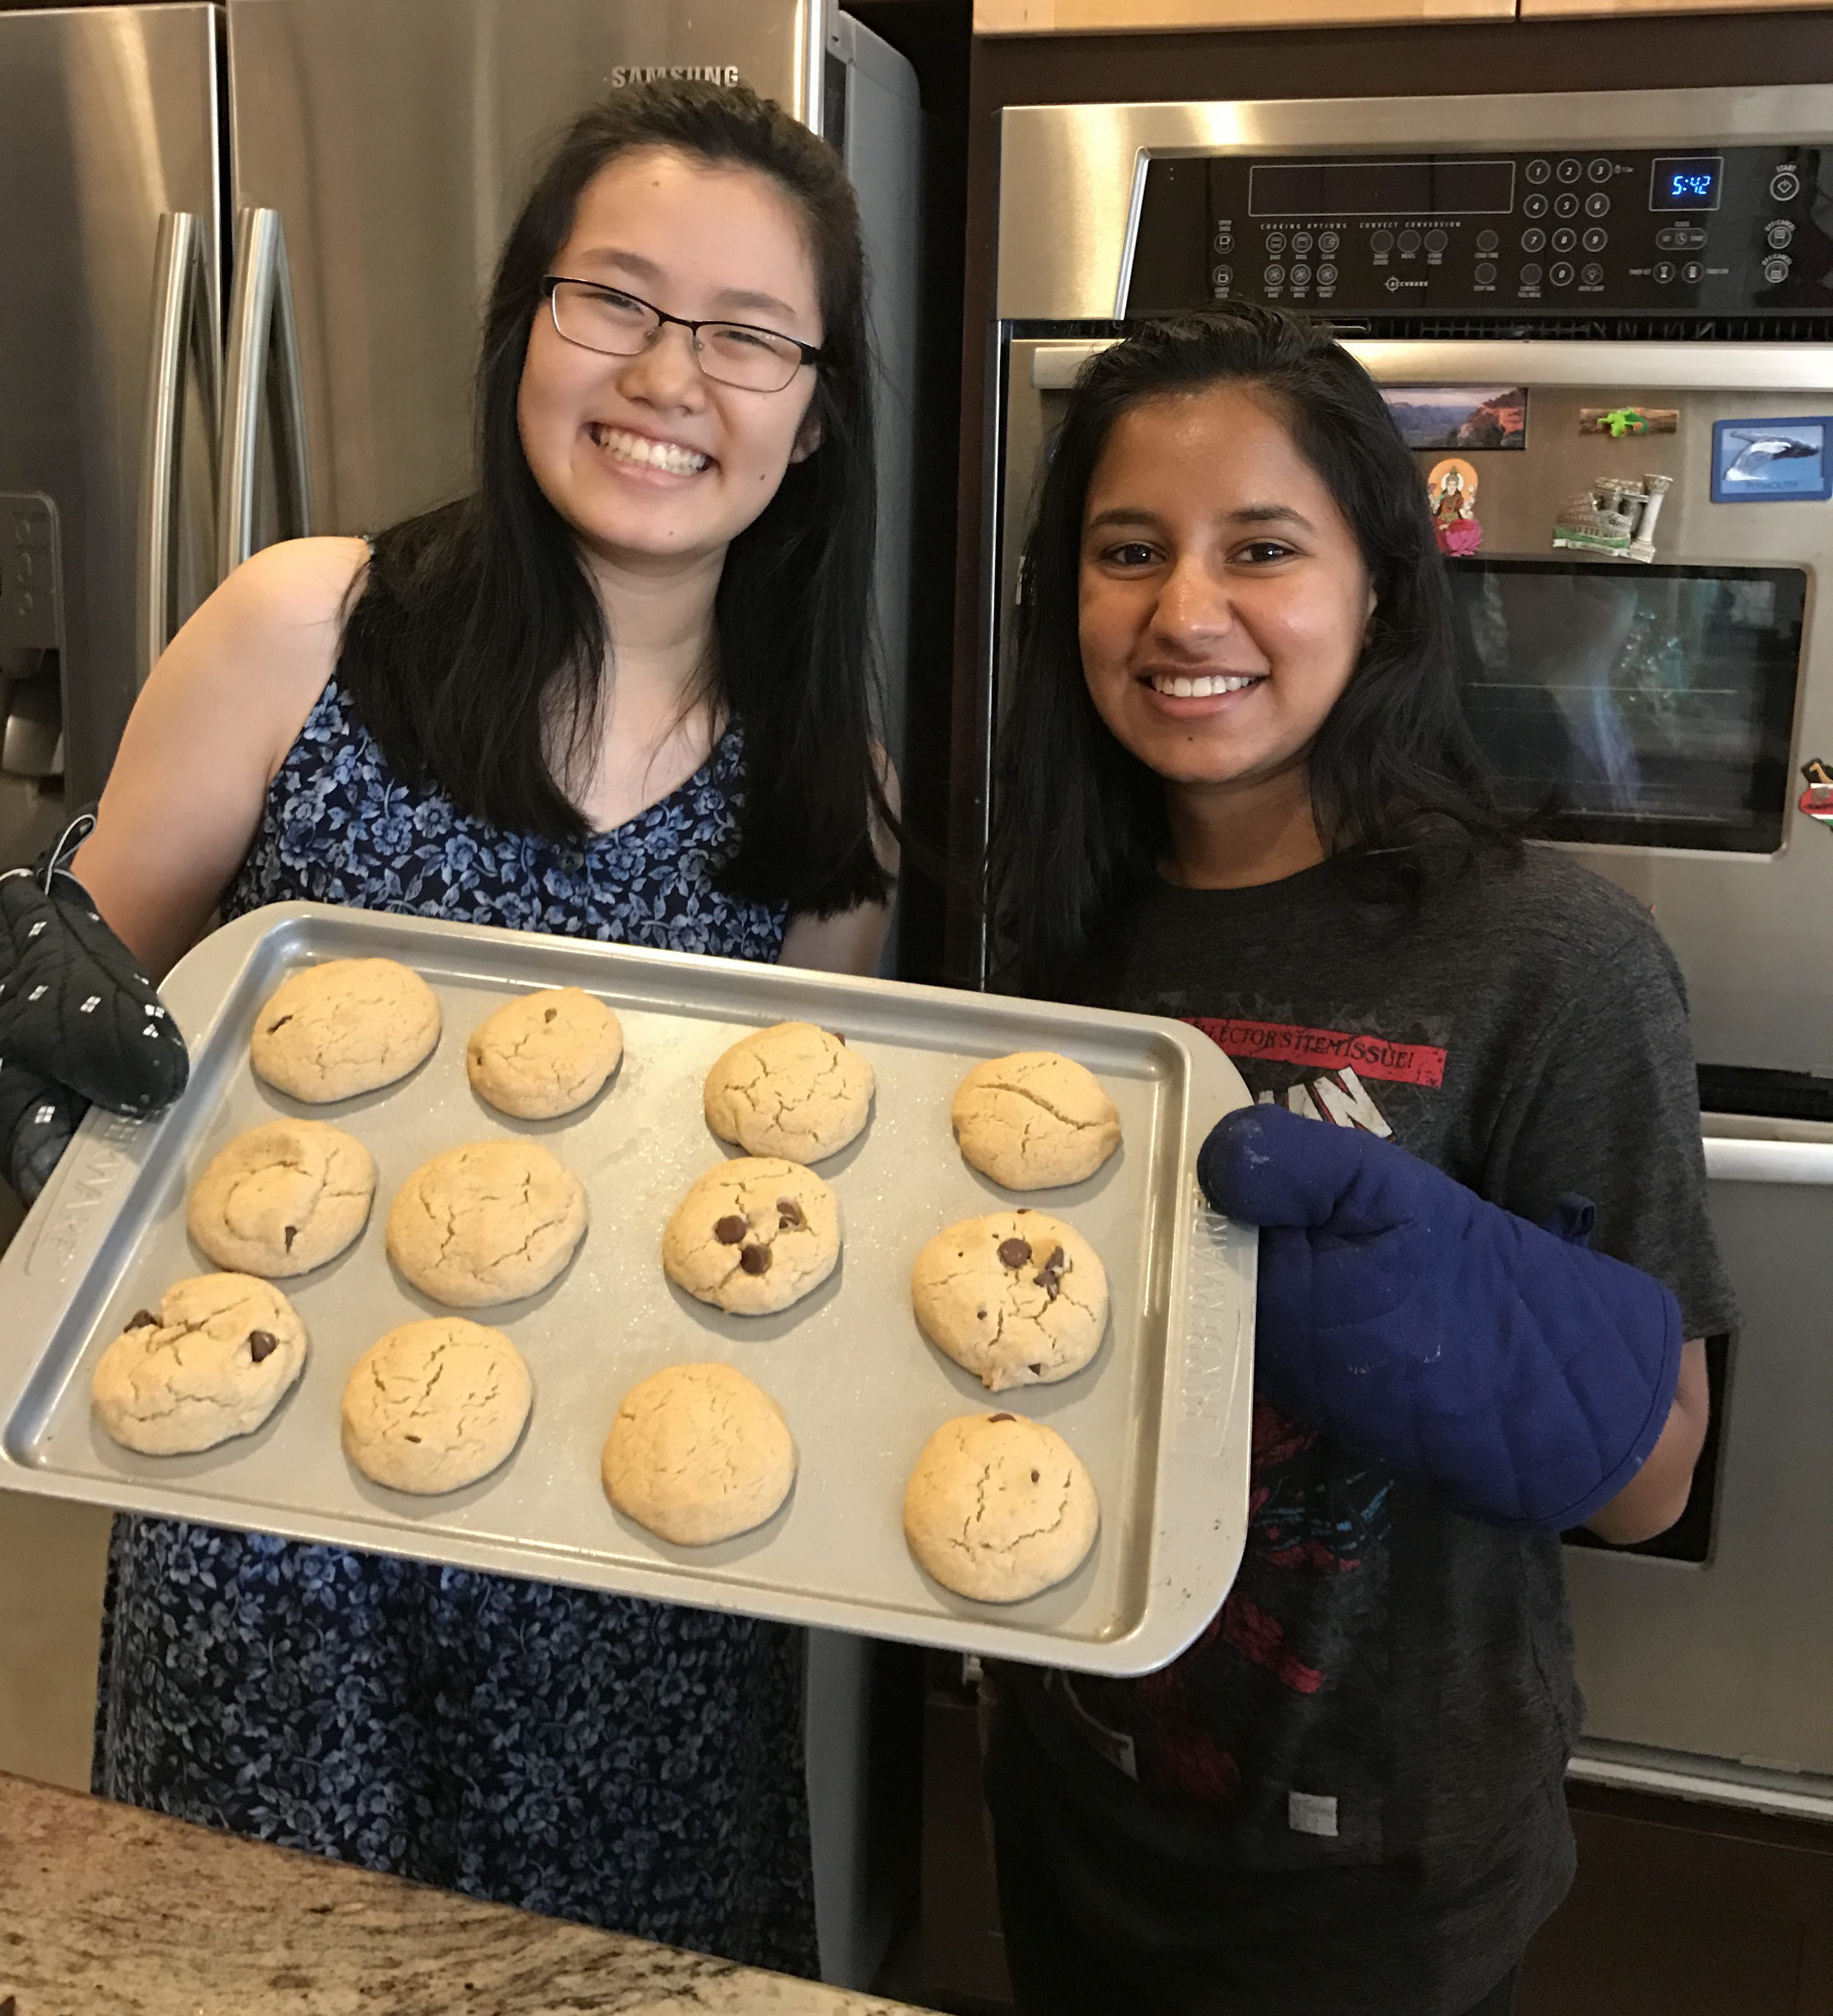
by Maya Girimaji & Jennifer Zhan, managing editor & editor-in-chief
Maya can cook. Jennifer cannot. For three months, the two of us have been trying to find recipes that people of any skill level can make, whether that’s a full meal, a snack, or a dessert for cheat day.
As it is the last month of summer, we thought it would be fitting to finish up our culinary adventure with a dessert and try making a batch of cinnamon chocolate chip cookies. We modified a recipe from Tastemade. Here’s what we did:
1. Get your ingredients.
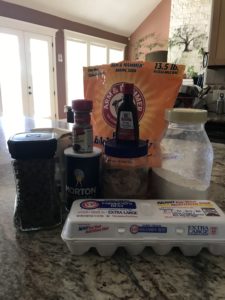 M: You’ll need all-purpose flour, baking soda, salt, cinnamon, butter (we used oil), white sugar, brown sugar, eggs, vanilla extract and dark chocolate chips of course.
J: Maya tells me that it’s important to be exact when making cookies, so we also got out a lot of measuring cups and spoons.
M: Baking is very different from cooking. With cooking, you can experiment and alter it to fit your taste but with baking it’s like chemistry. If it’s not exact, then you will fail.
2. Mix the flour, salt, cinnamon and baking soda in one bowl.
J: You’ll need 2 ¼ cups of flour, ½ teaspoon salt, ½ teaspoon cinnamon, and ½ teaspoon baking soda.
M: It’s a good idea to sift your ingredients before putting it in a bowl just so you can get the clumps out. We forgot to do that step so Jennifer just got the clumps out with a fork.
J: But the hard manual labor will be bearable because the whole bowl is going to smell like cinnamon. Amazing.
3. Next, mix the white sugar, brown sugar, vanilla extract, and butter/oil.
J: We used ½ cup white sugar, 1 cup brown sugar, and 2 teaspoons vanilla extract.
M: We used oil instead of a cup of butter, so if you want to do that, add ¾ cup of oil. While mixing your ingredients, add in the oil slowly so the sugar doesn’t spray everywhere. We used a hand mixer.
J: Also, probably get a deep bowl. Fun fact: when you use a shallow bowl, it doesn’t matter how careful you are. The mixer is still going to blast everything over the rim.
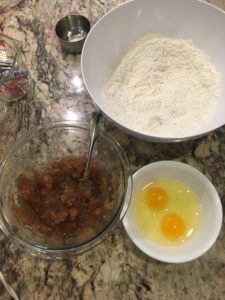
4. Beat 2 eggs in a separate bowl and add it to the sugar butter mixture.
J: I only know how to beat eggs with chopsticks, but I’m told that other people do it differently. Anyway, once you’re done, pour the eggs in the same way you poured the oil – slowly and carefully!
M: I like to beat eggs with a fork. The point of beating the eggs before adding it to the mixture is to make the eggs fluffy and airy which makes the dessert soft.
5. Add the egg mixture to the dry ingredients, combining all of the ingredients in one.
J: If you’re doing everything right, the mixture should be very sticky and kind of give you an arm workout. You need to make sure that everything is evenly mixed so that it’ll be easy to form the actual cookie shapes later.
M: Make sure everything is mixed properly. While you’re mixing the ingredients, scrape the side of the bowl in order for all of the ingredients to be mixed together. This is a critical step because we later learned that if the ingredients aren’t mixed properly then it can be hard to form the balls of cookie dough.
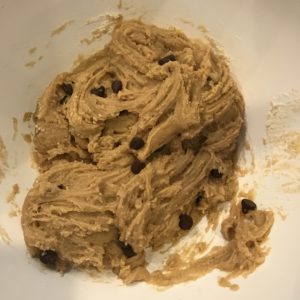
J: Ooh, and this step is when you finally get to sprinkle in as many chocolate chips as you want!
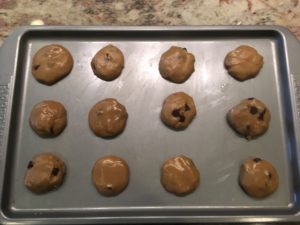
6. Oil up a few pans and start to put your cookie dough on!
M: If you’re using your hands to form the balls, I recommend oiling one hand and using that hand to roll the balls and using the dry hand to scoop up the cookie dough with a spoon.
J: We scooped out dough in roughly golf-ball sized amounts. Those ended up turning into cookies that were just a little smaller than store-bought ones. I was surprised that they expanded that much in the oven, actually.
M: This is a very important step. You don’t want to make the balls too big or else they won’t bake properly and you also don’t want to make them too small because you might burn the cookies. Like Jennifer said, the cookies expand, so space out the balls properly so that when they expand the cookies won’t mold together to form a giant cookie.
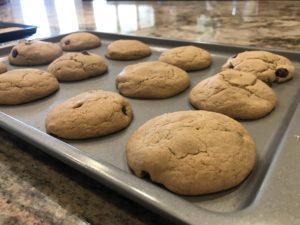
7. Preheat the oven to 350 degrees Fahrenheit, then bake your trays for about 8 or 9 minutes.
J: I would just like to say that I kept accidentally talking about how fun it was to cook together even though we were actually baking. In my defense, I feel like the name ‘cookies’ is a bit misleading and ‘bakies’ would have been a much more appropriate name.
M: Uh….sure. The cookies should have golden-brown edges when they’re done baking. Once you take out the cookies stick a toothpick in the center of one cookie. It shouldn’t be too soft that it’s runny but it also shouldn’t be too hard.
J: They might have been a little underbaked but I think that just made them a little softer. Anyway, the edges of the cookies were golden, and apart from some…questionable shapes, they looked great to me.
M: These cookies looked a little different than normal cookies. They look a little like sugar cookies (maybe because we didn’t put any chocolate chips on top of the cookies so you couldn’t really see them). But they still tasted delicious. I’ve never added cinnamon to chocolate chip cookies before but I think I will from now on because the cookies smell like Christmas and the cinnamon adds a faint little kick.
8. Take the trays out of the oven and allow them to cool for 10 or so minutes.
M: While you wait for them to cool, the heat trapped inside will continue to bake the cookie. This is a simple rule of thumb for baking in general.
J: Sounds pretty wild to me, but I’ll take your word for it.
9. Enjoy!
J: This is always the best step. I think for me, it’d be hard to make a cookie that I didn’t like. These were a really nice texture- soft, but not overly gooey. I was also surprised at how much cinnamon you could taste in each bite, but I liked that too.
M: Yeah, these were probably the best cookies I’ve ever made. And it’s an easy recipe that you can make in an hour or so and show off to all of your friends.
J: And make sure to serve them with milk. As we all know, that’s a winning combination.
M: Next time you want to make something everybody will love you should try this recipe out!